You can feel it the moment a room opens to Aspen Highlands and the Maroon Bells. The mountains pull you in, the light shifts, and everything else fades. If you own or are considering a home in West Aspen, you want that feeling every day, in every season. In this guide, you’ll learn how to plan glazing, rooflines, and site layout so you capture those panoramic views while staying comfortable, energy efficient, and snow safe. Let’s dive in.
Neighborhood nuances: Five Trees, Meadowood, Maroon Creek
Each pocket of West Aspen offers different opportunities and constraints for view design.
- Five Trees: Lots tend to be smaller and closer to town with mature tree cover. That means you often need selective tree work, careful siting, and elevated living spaces to see over vegetation and neighboring roofs. Expect design review and landscape controls.
- Meadowood: Parcels are larger and more open, which gives you room for broad glazed walls, long sightlines, and generous terraces. Landscaping and privacy become choices to shape views, not hurdles to overcome.
- Maroon Creek Road: These linear parcels follow the valley, with axial view lines toward the peaks. Narrower building envelopes, steep grades, and setbacks often drive orientation and floorplate strategies.
Understanding where your lot sits and how neighboring elements affect sightlines is the first step to unlocking Highlands views.
Site planning for strong sightlines
Start with a clear plan for how you will see the mountains from daily spaces.
- Perform a view study early. Use panoramic photo stakes and simple massing models to trace the vertical sightline from typical standing and seated eye heights.
- Establish primary and secondary view axes. Place living, dining, kitchen, primary bedroom, and outdoor living along those axes.
- Use split levels and modest cantilevers where the slope helps raise your main living level above foreground trees or roofs.
- Keep circulation internal. Avoid tall exterior elements that block view corridors and concentrate height where it frames rather than interrupts vistas.
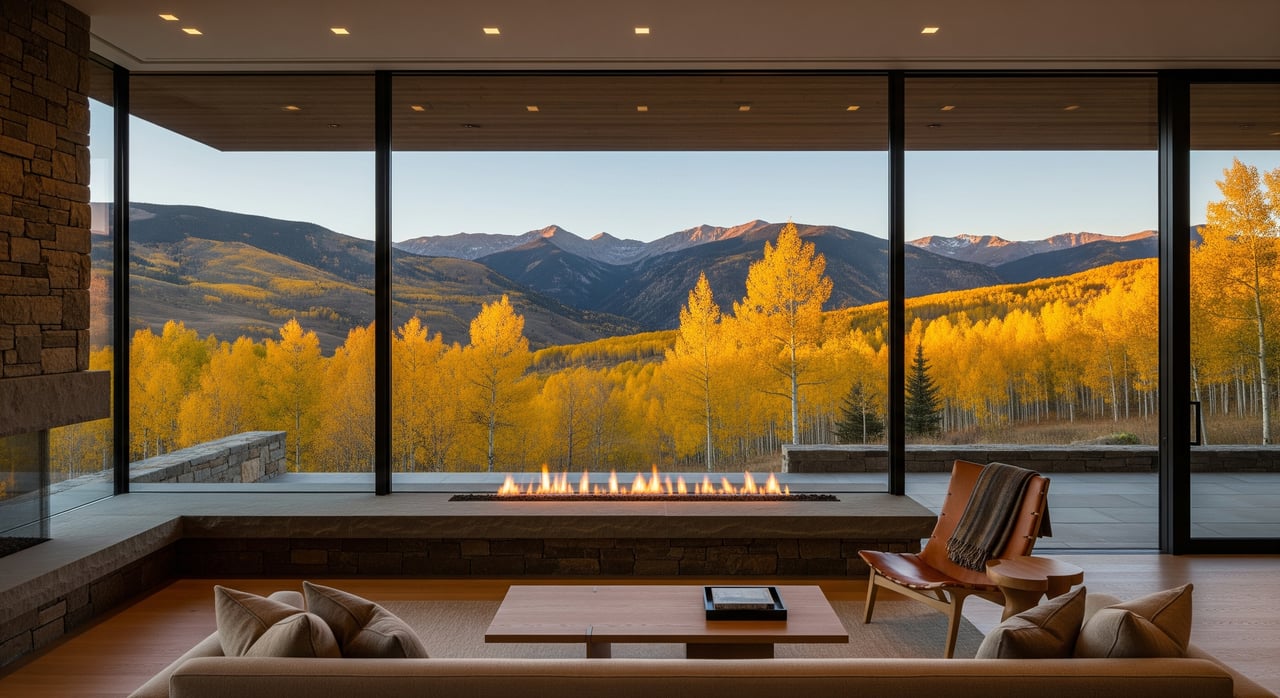
A little elevation can be more effective than an entire glass wall at ground level. The goal is a clear, comfortable view, not just more glass.
Glazing choices for clarity and comfort
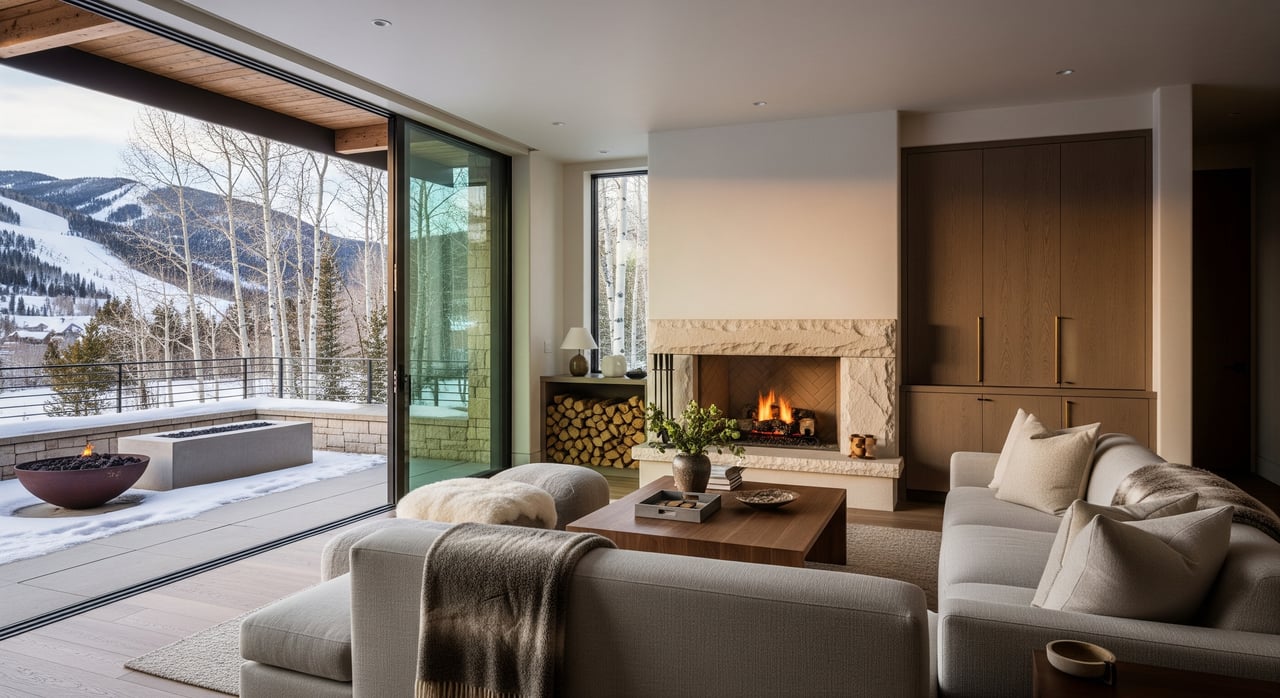
You want wide-open views without cold drafts, glare, or condensation. High-performing glazing makes the difference.
- Prioritize low U-factor windows to limit winter heat loss in Aspen’s cold climate. Thermally broken frames and high-performance double or triple glazing help maintain comfort.
- Tune Solar Heat Gain Coefficient by orientation. South-facing glass can use moderate SHGC for winter warmth. East and west exposures typically need lower SHGC or shading to control glare and summer gain.
- Choose coatings that protect performance without dulling the view. Higher visible transmittance helps maintain that crisp mountain clarity.
- Mix fixed and operable units. Large picture windows or fixed panels carry the view, while smaller casements, tilt-turns, or awning windows bring in fresh air without breaking the composition.
- Consider corner glazing to open panoramic vistas. Structure the corner with a hidden post or laminated system to keep the glass as clean as possible.
- Use clerestories to look over near obstacles. High bands of glass can capture ridgelines while keeping lower walls private and well insulated.
If you are pushing for full-height glass, pair it with an energy plan that includes modeling, shading, and top-tier installation. That keeps surfaces warm, controls condensation risk, and ensures you enjoy the view year-round.
Advanced glazing options to weigh
- Triple glazing: A comfort and condensation upgrade that shines in high-altitude cold. It is heavier and costlier, so confirm with energy modeling.
- Low-E coatings by orientation: Higher SHGC on south, lower on west. The right coating mix balances winter sun with summer control.
- Gas fills and warm-edge spacers: Small improvements that add up in comfort and performance.
- Dynamic glazing: Useful when exterior shading is limited. It manages glare and heat at the touch of a button, but plan for integration and maintenance.
Balance the budget between glass area and glass quality. High-performance windows with thoughtful placement often beat sheer size.
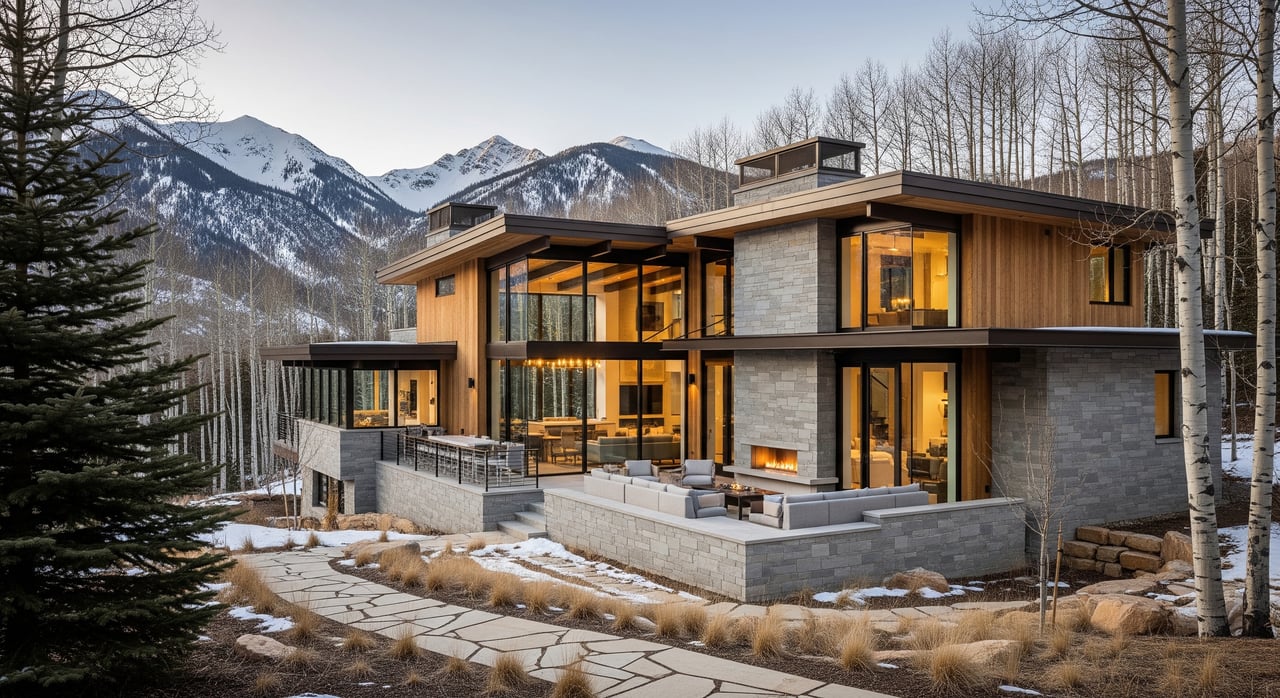
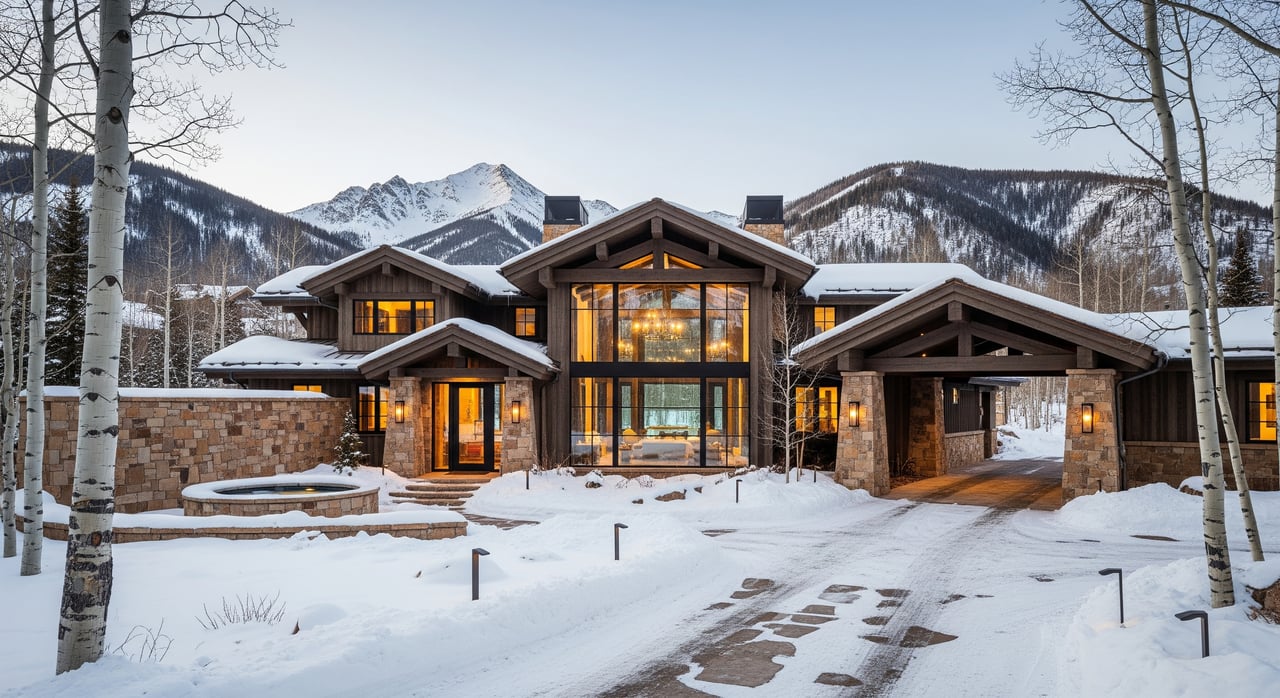
Roof forms and snow strategy
Your roofline shapes the interior experience and how snow behaves around glass and outdoor areas.
- Gable roofs: A classic mountain form that sheds snow quickly. When oriented well, gables can frame views. Plan snow retention to protect glazing and entries below.
- Shed roofs: Create tall interior volumes and clerestories on the uphill side. Size the pitch to manage snow shedding and avoid excessive drift on the downhill side.
- Butterfly roofs: Dramatic and great for panoramic glazing on one side, but they demand robust drainage and drift management at the valley.
- Flat roofs: Clean, modern look with potential for roof terraces and viewing platforms. They require strong structure for snow loads, durable waterproofing, and careful drainage.
- Stepped or split-level forms: Follow the slope to elevate day spaces and reduce excavation while preserving critical sightlines.
Coordinate early with a licensed structural engineer for snow load calculations, drift patterns, and sliding snow zones. Use snow guards, heated eaves or gutters where needed, and keep walkways, balconies, and big windows out of uncontrolled shed paths.
Roof-to-glass detailing that lasts
- Integrate thermal breaks and continuous load paths where overhangs meet large glazing.
- Add drip edges, gutters, and careful flashing to protect against freeze-thaw stress.
- Consider exterior screens or sacrificial shades above large windows. They absorb snow impact and are easier to replace than glass.
These details safeguard your investment and extend the life of your envelope.
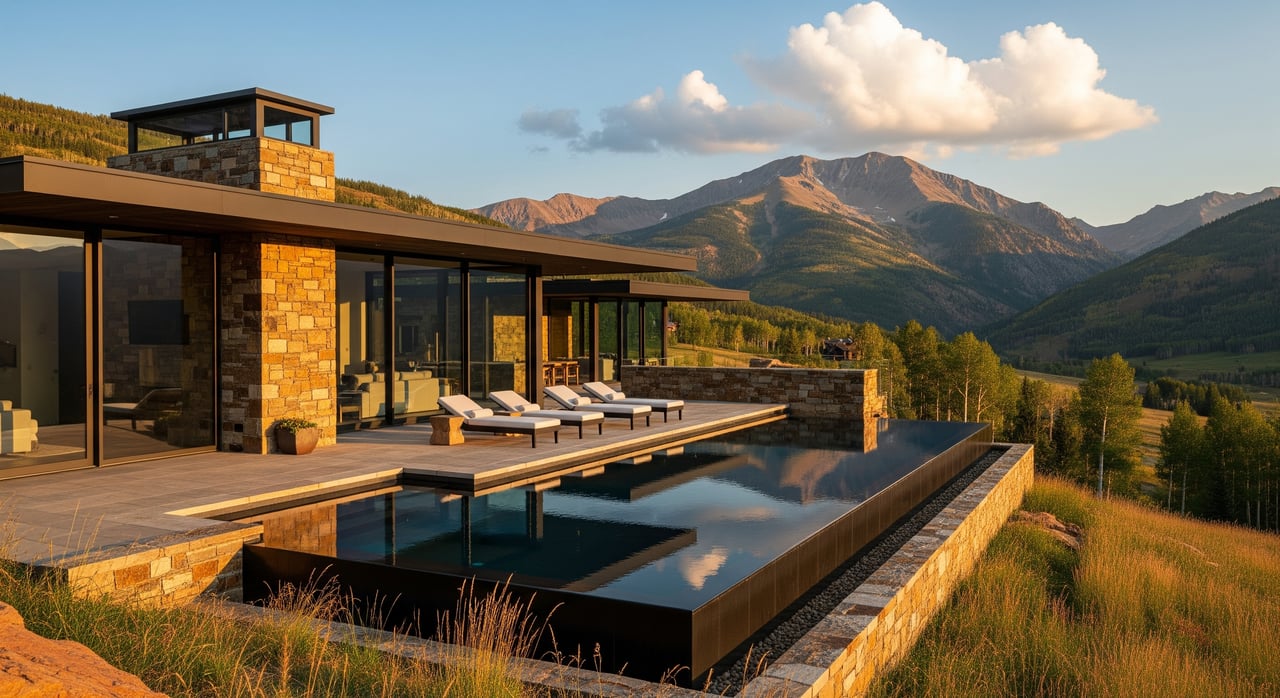
Massing that protects the view
Think of your home as a series of frames that lead your eye to Aspen Highlands.
- Raise primary day-space floors to get above near obstructions.
- Use stepped volumes on the view side to reduce bulk and preserve long sightlines.
- Deploy clerestories to keep privacy while pulling distant peaks inside.
- Explore modest cantilevers to float past tree canopies where structure allows and snow behavior is addressed.
Inside, sequence rooms so daily life builds to the view. Circulation and utility spaces can buffer less important exposures and make the final reveal more powerful.
Landscape moves that keep vistas
- Work with a certified arborist to decide what to trim versus remove. Selective thinning opens long views while protecting slope stability and site character.
- Choose native, lower-height plantings near edges for privacy that does not block distant peaks.
- Use terraces and low retaining walls as foreground planes that visually recede, bringing the mountains forward.
In Five Trees, gentle thinning and tight choreography can turn filtered views into sweeping ones. In Meadowood, landscaping can be your fine-tuning tool for privacy without losing width.
Energy and comfort musts
Large windows should feel as good as they look. Tie design to performance early.
- Run whole-building energy modeling to set glazing area by orientation and define targets for U-factor and SHGC.
- Emphasize south and southeast glass with proper shading, limit west glare, and pair high-performance glazing with robust insulation and airtight construction.
- Consider heat-recovery ventilation for fresh air without heat loss. If you aim for extreme efficiency, Passive House strategies can raise comfort even further.
A deliberate performance plan keeps operating costs in check and maintains comfort during deep winter.
Permits and approvals checklist
In West Aspen, plan for local review and professional coordination.
- Confirm if you are under Pitkin County or City of Aspen review and whether your lot sits in an overlay district.
- Verify height limits, setbacks, and any view protection rules that may apply.
- Obtain structural snow load calculations and stamped drawings from a licensed engineer.
- Check for tree-removal permits and riparian setbacks, especially along Maroon Creek.
- Prepare stormwater and erosion control plans for hillside work.
Getting these items right early streamlines approvals and protects your schedule.
Your step by step roadmap
- Site reconnaissance and view study. Photograph key sightlines and map trees, neighboring roofs, and sun paths.
- Schematic design that fixes orientation, main living elevation, and massing around your primary view axes.
- Structural and geotechnical input to set roof pitch, snow retention, and foundation solutions.
- Energy modeling to calibrate glazing size, frame types, and performance targets.
- Glazing specifications coordinated with manufacturers for condensation control, safety glass, and high-altitude installation.
- Permit and design-review submittals, including tree and erosion control plans.
- Landscape and arborist plan that balances view opening and site character.
This sequence turns an abstract view goal into a buildable, comfortable home.
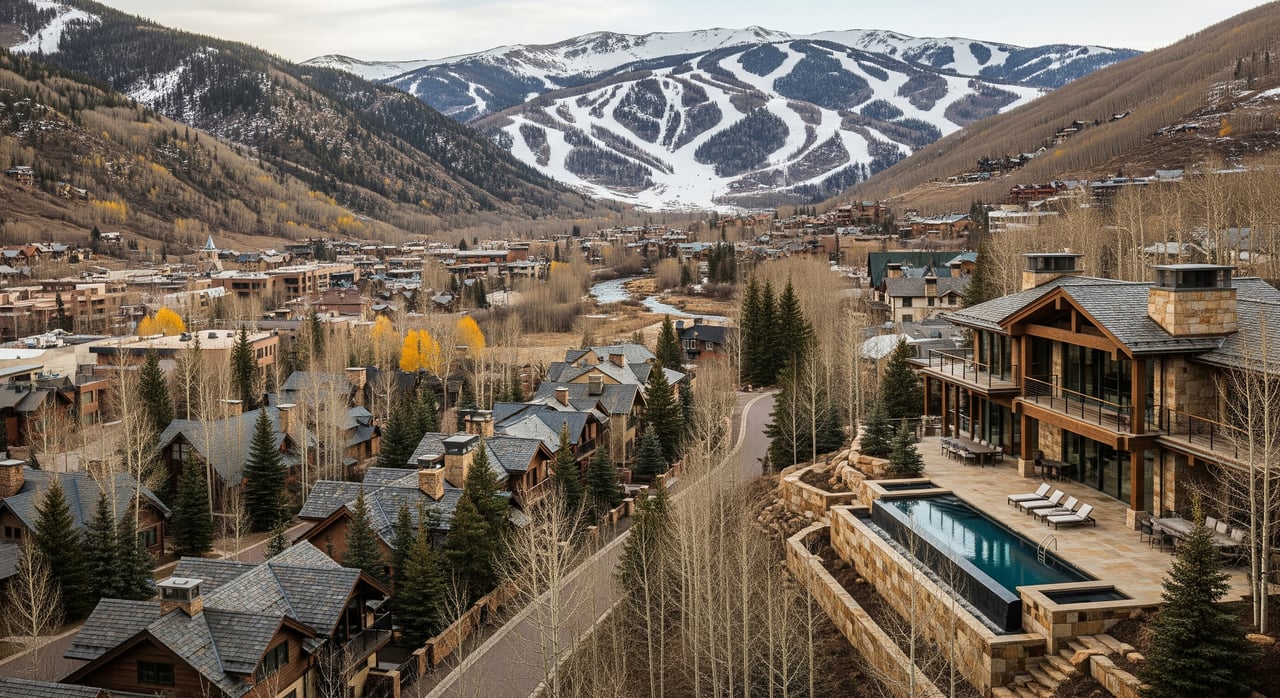
Buying or renovating in West Aspen
If you are shopping, look for lots or homes that already align with view axes to Aspen Highlands or the Maroon Bells. A south or southeast bias, a slope that lets you raise the main level, and room for controlled roof forms are strong indicators that the view can be extraordinary. Note mature tree stands, neighboring roof heights, and current glazing orientation. These are clues to how easily you can improve sightlines.
If you are renovating, focus on targeted moves that have outsized impact: lift the day-space floor a few steps, add clerestories above eye-level obstacles, replace underperforming units with high-performance fixed panels paired with discreet operables, and tune coatings by orientation. Address snow behavior when adjusting roof pitch or adding overhangs. Small, strategic changes can unlock an entirely new panorama.
When you are ready to talk locations, options, and the pathway from idea to execution, The Shea Team can share neighborhood context and connect you with architects, engineers, and contractors who know how to build for Aspen conditions. You get a practical, local roadmap to a view-rich, comfortable home.
Ready to find your own Highlands-facing perch or explore upgrades that amplify what you already have? Connect with The Shea Team for local guidance and a curated plan.
FAQs
How do I get the best Aspen Highlands view on a Five Trees lot?
- Start with an early view study, then elevate day spaces, use clerestories to look over trees, and shape glazing toward your primary view axis. Plan for design review and selective tree work.
What window types work best for West Aspen’s cold climate?
- Use high-performance fixed picture windows for clean views, paired with smaller operable casements or tilt-turns. Prioritize low U-factor, tuned SHGC by orientation, and thermally broken frames.
Will large windows mean higher heating bills in Aspen?
- Not if you combine high-performance glazing, airtight construction, smart orientation, and shading. Energy modeling helps set the right glass area without sacrificing comfort.
Which roof forms are safest around big windows and snow?
- Gables and well-pitched shed roofs shed snow predictably when paired with snow guards and heated eaves where needed. Butterfly and flat roofs can work with robust structure and drainage.
Can I remove trees to open a view along Maroon Creek Road?
- Often you can thin or remove select trees, but consult the county and a certified arborist. Preserve mature trees where possible to maintain privacy, character, and slope stability.
What professionals do I need for a view-focused build or remodel?
- Engage an architect with mountain experience, a structural and geotechnical engineer, an energy modeler, an arborist or landscape architect, a glazing specialist, and a local contractor skilled in snow management.